Email Aliases allow your team to send emails from addresses other than their user login. For example, if you wanted to send emails from a role account such as marketing@topechelon.com or info@topechelon.com, you could add those addresses as email aliases.
By default, all new users have access to manage and send emails from the firm’s verified email alias list. This includes the ability to add and/or delete addresses from the firm’s alias list.
Please note that the ability to set email alias permissions is restricted to only those users that have permission to manage users.
To set email alias permissions:
- Expand the Sidebar in the top right corner of the software and click on the Settings icon

- Click to expand the My Agency section and then select Manage Users
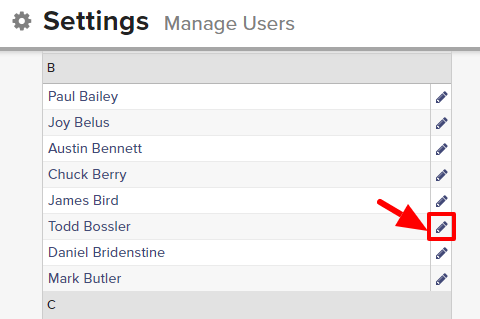
- All users on the account will populate on the left side of the Manage Users page
- Click on the edit icon
 to the right of the person you wish to set email alias permissions for
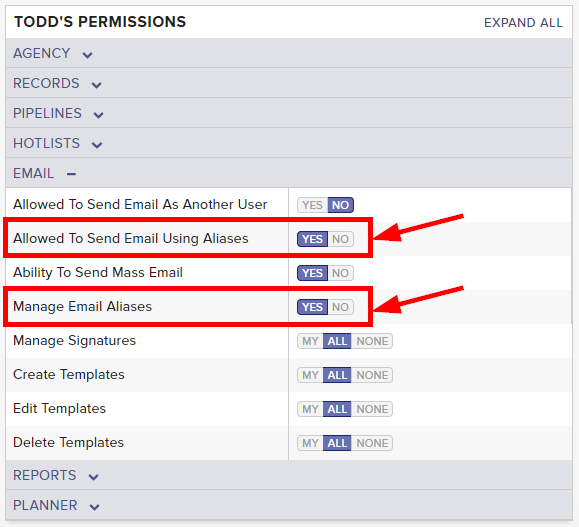
- Under the user’s Permissions on the right side of the User Profile, click to expand the Email section
- To the right of Allowed to Send Email Using Aliases, set the appropriate permission
- Yes = this user can send email from the firm’s verified email alias list
- No = this user cannot send email from the firm’s verified email alias list
- To the right of Manage Email Aliases, set the appropriate permissions
- Yes = this user can access the Manage Email Aliases page within settings (this includes the ability to add/delete addresses from the alias list)
- No = this user cannot access the Manage Email Aliases page within settings (and therefore cannot add/delete addresses from the alias list)
- Make sure to click the Save button in the bottom left corner once your changes have been made